Introduction
Within my homelab make use of a desktop workstation for a variety of roles, including hosting VMware Workstation for additional capacity. Making effective use of this, however, requires having multiple networks (VLANs) available to some combination of the host workstation and/or virtual machines running within VMware workstation.
When I first approached this, I viewed my ideal setup as a network interface for my workstation to use as its primary interface (the built-in card) and an additional interface for all the VLAN based interfaces. For a while with Windows 10 this was a non-starter of a configuration, at least with Intel network cards. Because of this my first implementation involved add-in NICs and several patch cables. Once the appropriate drivers where available, the easiest NIC I could verify the updated drivers supported was my built-in interface. Based on that I ended up using a single interface for everything. Overall this single interface configuration has worked well. I have experienced issues following some Windows updates where my configuration stops working.
When this does stop, restoring functionality requires a reinstall of the drivers and reconfiguring the VLAN interfaces. While it isn’t a huge deal to redo this each time, it doesn’t happen often, the ad-hoc approach I took resulted in a slightly different setup each time, and repeatedly spending time looking up IP addresses and VLAN IDs. Based on this I decided to automate as much of this process as possible. This should quickly get things back to a known configuration and on with more exciting lab adventures. So far I’ve been able to automate everything on the host Windows system. Automating the Workstation network configuration is a yet to be solved problem.
Before we go any further, however, a few notes:
- If you do need to uninstall the Intel drivers (for example to reinstall the same or a new version), you should first remove the VLAN interfaces (basically reverse the process describe for setting everything up), otherwise you may end up with phantom adapters and warning from Windows as you setup new interfaces with the same static IP addresses as what it remembers the previous interfaces having.
- This process may not be supported by any vendor involved. Your success with these steps may be wildly different, may let the magic smoke out of your computer, etc. Use as your own risk.
- Based on everything above and the limited opportunities I have for testing this, this is being presented as “some assembly required.” I’m not going to hand you a single script at the end of the post. You should however have the parts required to put one together for your own use.
- Installing and uninstalling the Intel drivers are currently outside the scope of what I want to automate today.
- You should be able to do something similar with other vendors’ cards with appropriate drive functionality. However, you won’t find that documented here.
As a FYI, my general process when this does break is to remove the defined interfaces, download the latest driver installer for my network card, , uninstall “Intel Network Connections” via the control panel, install the latest version of drivers and PROSet, and then pick up with the steps described below.
Phase 1a – Host Workstation Setup – adding VLAN interfaces
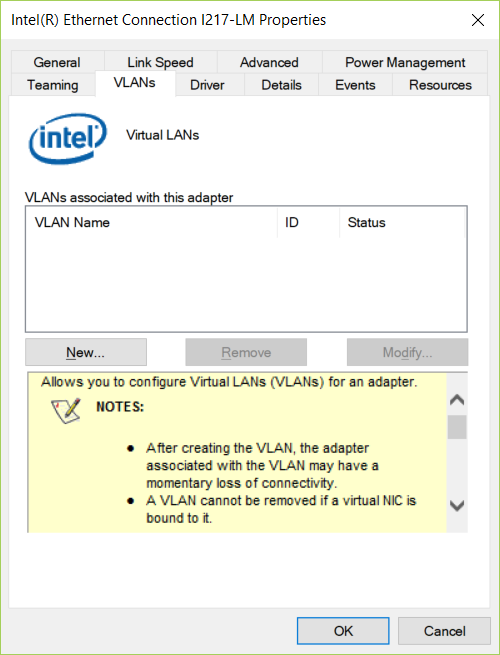
Before starting any of this I’m assuming there is a compatible Intel network adapter present and Intel network adapter drivers installed. You should have a VLAN tab when viewing the network adapter properties via device manager, as shown below.
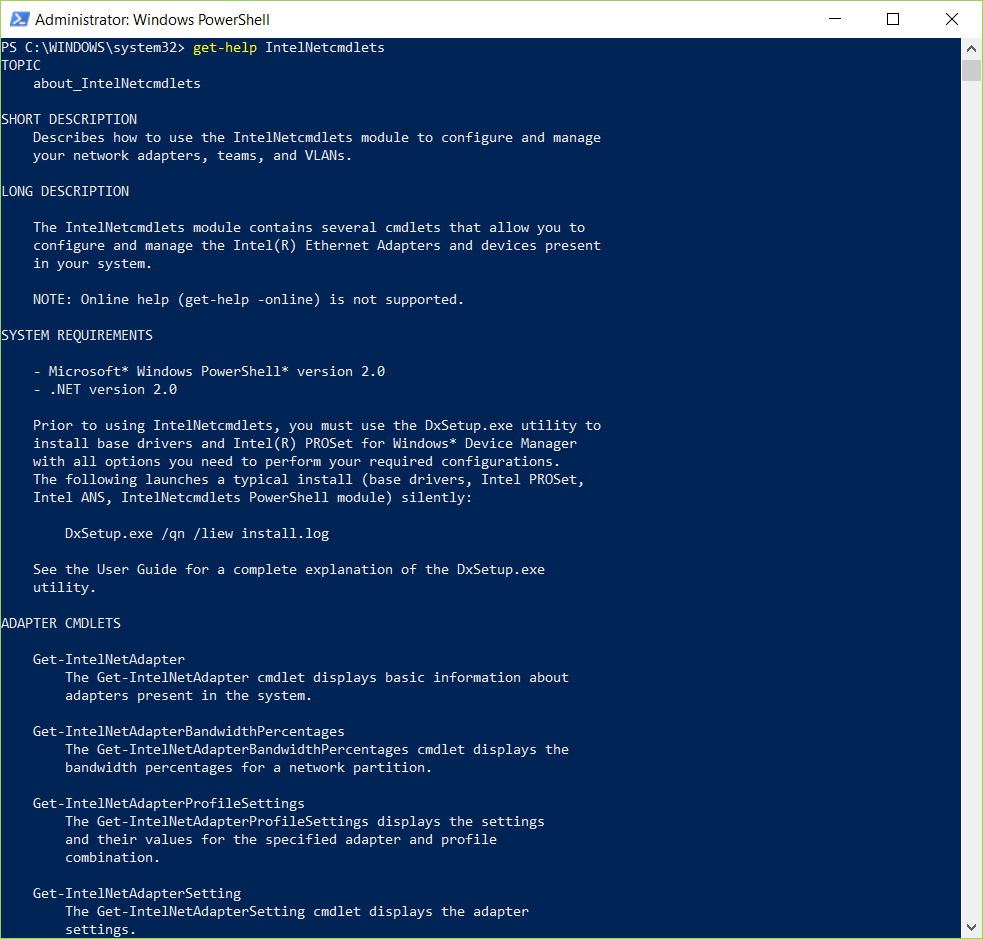
Intel provides a set of PowerShell cmdlets for interacting with the advanced networking services required for teaming and VLANs. You can get an overview of these cmdlets via PowerShell’s get-help command, or looking for the file “about_IntelNetcmdlets.help.txt” in the “IntelNetCmdlets” folder inside the install location for the drivers, default “C:\Program Files\Intel\Wired Networking\IntelNetCmdlets”.
Get-Help IntelNetcmdlets
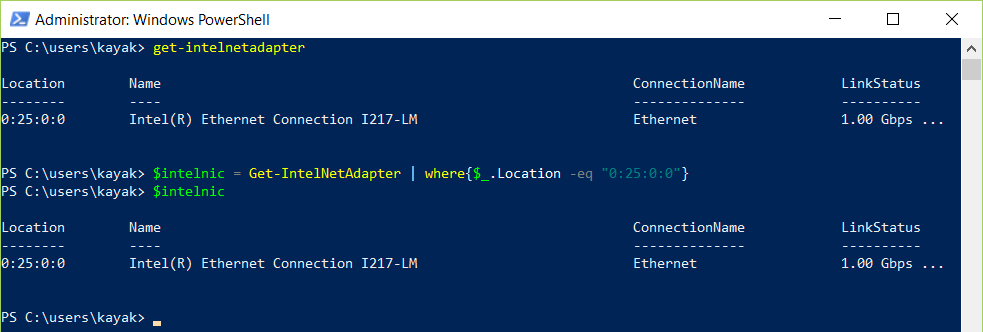
Before we can define any VLAN interfaces, we need to get a reference to our adapter. [Note: you’ll need to run these cmdlets with administrative privileges.] Get-IntelNetAdapter will provide you with a listing of available adapters. Once the appropriate adapter has been identified, it can be saved for future reference, as shown below.
$intelnic = Get-IntelNetAdapter | where{$_.Location -eq "0:25:0:0"}
You can use Get-IntelNetVLAN to view any existing VLAN definitions, if needed. If any of these overlap with those you wish to define you’ll need to remove them.
To create these VLAN definitions, Add-IntelNetVLAN and Set-IntelNetVLAN become the cmdlets of choice. Add-IntelNetVLAN allows you to create the VLAN based on VLAN id and the parent interface. Set-IntelNetVLAN allows you to set a VLAN name via the -NewVLANName parameter. As noted previously, my goal in doing this was to get a consistent network configuration, so I placed all my VLAN information in an array and then looped over that array to define each VLAN. If you need to keep an untagged VLAN, use VLANID 0.
$networkVLANs=(
    @{"VLAN"="410";"Name"="Lab Data";"IPv4Addr"="10.231.1.95";"IPv4Prefix"=24;"DNSSuffix"="lab.jley.net";"RegDNS"=$true;"DNS"=@("10.231.1.5")},
    @{"VLAN"="430";"Name"="Lab Mgmt";"IPv4Addr"="10.231.3.95";"IPv4Prefix"=24;"DNSSuffix"="mgmt.lab.jley.net";"RegDNS"=$true;"DNS"=@("10.231.1.5")},
    @{"VLAN"="450";"Name"="VDI Desktops";"IPv4Addr"="10.231.5.3";"IPv4Prefix"=25;"RegDNS"=$false},
    @{"VLAN"="0";"Name"="Home Network";"IPv4Addr"="192.168.10.95";"IPv4Prefix"=24;"Gateway"="192.168.10.10";"DNS"={"192.168.10.4","192.168.10.10"};"DNSSuffix"="home.jley.net";"RegDNS"=$false}
)

foreach($network in $networkVLANs)
{
    Add-IntelNetVLAN -Parent $intelnic -VLANID $network["VLAN"]
    Set-IntelNetVLAN -Parent $intelnic -VLANID $network["VLAN"] -NewVLANName "$($network["VLAN"]) - $($network["Name"])"
}
Phase 1b – Windows Interface Settings
At this point, all of the VLAN interfaces are created and available within Windows. Depending on your network configuration and desires this may be all that is needed. However, if you have need to change the network configuration, this would be the time to do so. In my case, I give each interface a static IP address and only define a gateway on a single interface, forcing all traffic not local to one of these networks (most likely Internet bound) to use a single VLAN.
The important element here is to have a way to identify the interface within Windows. As we set a name for each interface, we can use this and the Get-NetAdpter cmdlet to get an appropriate reference. This does assume you set something unique for each name. As I’m again using a loop to set this for all networks, below is simply getting the interface alias, we’ll set some properties next.
foreach($network in $networkVLANs)
{
    $winInterfaceAlias = (Get-NetAdapter -InterfaceDescription "*$($network["Name"])*")[0].InterfaceAlias
}
Now we can use our standard Windows cmdlets to set network connection properties. You can probably do without some oft he removes and resets, but those crept in as I was testing things out piecemeal.
- remove any existing address assigned using Remove-NetIPAddress
- remove any existing routes definitions using Remove-NetRoute
- disable dhcp using Set-NetIPInterface
- set static IP address with or without a gateway using New-NetIPAddress
- if required, set DNS server addresses using Set-DnsClientServerAddress, otherwise reset the current value
- if required, set a dns suffix using Set-DNSClient otherwise rest the current value
- if required, configure DNS registration using Set-DnsClient.
Here’s the same loop as before with each configuration option:
foreach($network in $networkVLANs)
{
    $winInterfaceAlias = (Get-NetAdapter -InterfaceDescription "*$($network["Name"])*")[0].InterfaceAlias
    if($network.ContainsKey("IPv4Addr"))
    {
        Remove-NetIPAddress -InterfaceAlias $winInterfaceAlias -AddressFamily IPv4 -IncludeAllCompartments -Confirm:$false
        Remove-NetRoute -InterfaceAlias $winInterfaceAlias -Confirm:$false -ErrorAction SilentlyContinue
        Set-NetIPInterface -InterfaceAlias $winInterfaceAlias -Dhcp Disabled
        if($network.ContainsKey("Gateway"))
        {
            New-NetIPAddress -InterfaceAlias $winInterfaceAlias -AddressFamily IPv4 -IPAddress $network["IPv4Addr"] -PrefixLength $network["IPv4Prefix"] -DefaultGateway $network["Gateway"]
        }
        else
        {
            New-NetIPAddress -InterfaceAlias $winInterfaceAlias -AddressFamily IPv4 -IPAddress $network["IPv4Addr"] -PrefixLength $network["IPv4Prefix"]
        }
    }
    if($network.ContainsKey("DNS"))
    {
        Set-DnsClientServerAddress -InterfaceAlias $winInterfaceAlias -ServerAddresses $network["DNS"]
    }
    else
    {
        Set-DnsClientServerAddress -InterfaceAlias $winInterfaceAlias -ResetServerAddresses
    }
    if($network.ContainsKey("DNSSuffix"))
    {
        Set-DNSClient -InterfaceAlias $winInterfaceAlias -ConnectionSpecificSuffix $network["DNSSuffix"]
    }
    else
    {
        Set-DnsClient -InterfaceAlias $winInterfaceAlias -ResetConnectionSpecificSuffix
    }
    if($network.ContainsKey("RegDNS"))
    {
        Set-DnsClient -InterfaceAlias $winInterfaceAlias -RegisterThisConnectionsAddress $network["RegDNS"] -UseSuffixWhenRegistering $true
    }
}
At this point all of these interfaces are defined and functional with the Windows hosts. As I noted at the beginning, I haven’t found a way to automate the networking configuration within VMware Workstation, so for that part, I’m still off to the Virtual Network Editor and creating/editing bridged networks.