
[Updated 2018/04/14: Clarified cause of path changes when using the executable jar. Thanks to Michael Baldwin for the suggested improvement.]
Introduction
While preparing for my VCAP6-DTM Deploy exam, I happened across the below tweet and decided to include the sample application linked to in my plans.
Need a SAML demo app for your VMware Identity Manager homelab or POC? https://t.co/IvAgVcIKg5
— Peter Björk (@thepeb) June 1, 2017
For my studies, I built a quick Linux VM, tossed the application as-is onto it, ran it, and away I went. Now that I have more time I wanted to revisit this, improve my deployment a bit (including HTTPS instead of HTTP), and document the steps involved for the benefit of others, who may also be a hurry to get something up and going.
I’m assuming you have deployed an instance of the VMware Identity Manager appliance prior to undertaking the steps documented here. I’ve tried out this application with versions 2.4.1, 2.6, and 2.9 of Identity Manager and found it to work with each of those.
OS Install
For this demonstration, I’m going to build a virtual machine using Ubuntu Server 16.04 LTS, available from https://www.ubuntu.com/download/server. At time of writing the most recent version is 16.04.3. If you have boot media from an older release of 16.04, that will work as well. If you happen to favor a different distribution, or non-default options other than what’s documented in this post, you should be fine assuming you can easily get a version 8 Java JDK installed onto your platform/configuration of choice and have openssl and git available (or can otherwise get the appropriate files onto your system of choice).
As this application has minimal functionality and is running in a lab environment with little concurrent usage, you can provision this VM with minimal resources. This is especially handy if you are building out a lab for the full suite of VMware EUC products and fear becoming resource constrained. The VM for this example is build using 1vCPU, 512MB of RAM, and a 10GB disk.
To make this demonstration easier to follow, I’ve attempted to use a minimal set of tools and use default options where possible. This includes installing Ubuntu taking the defaults (i.e. pushing enter) as much as possible. The network this system was built on has a DHCP server and does not require a proxy server. If your network does not have a DHCP server available, you’ll be prompted to manually configure your network settings during the install.
The exclusions to taking the default were:
- supplying a customized value for the hostname
- unique values for user full name, username, and hostname
- disk partitioning made use of the “Guided -use entire disk” method, rather than the default “Guided – use entire disk and setup LVM”
- selecting Yes to write changes to disk
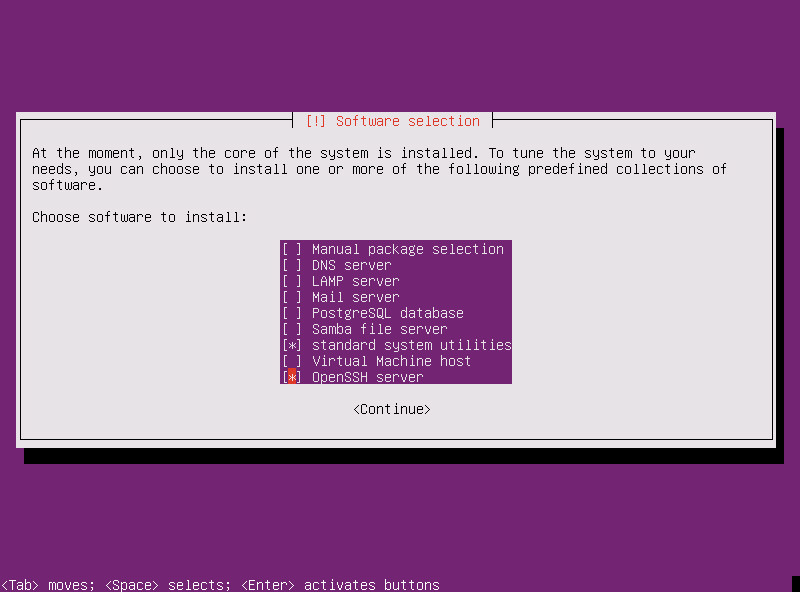
- including the OpenSSH server option when asked to choose software to install
If you manually assigned an IP address or if your dhcp configuration does not add forward and reverse DNS entries for your new host, you’ll need to do that at this point.
Once your system reboots and you have a login prompt you can use the account you created during setup to login. While all the commands that follow can be typed on the console for your new VM, connecting via ssh will provide you with the option of copying and pasting commands as needed.
Once logged in, we’re going to make sure everything is up-to-date and install the Java JDK. To do that, run the following commands:
sudo apt-get update
sudo apt-get dist-upgrade
sudo apt-get install openjdk-8-jdk-headless
Application Download
At this point, there’s several different ways to get the application onto our new server. Seeing as git is installed as part of the base system, I’ve elected to just clone the repository:
git clone https://github.com/vmware/idm.git
Running this in your home directory will create an idm folder containing the repository contents. As this is a test/lab application, I’ll leave it here.
Application Configuration
Now that we have everything download we can go about configuring the application. This is divided into three steps: configuring HTTPS instead of the out of the box HTTP, adding the identity manager url to the configuration, and adding the identity manager ssl certificate to the application’s keystore.
Configure HTTPS
I originally expected that converting the application from using HTTP to using HTTPS was going to be the bulk of the work involved in this revised application deployment. I spent some time poking around the code looking for obvious places to make changes, all without success. I did however, find an article by Driss Amri that explained how to add support for HTTPS within a spring application.
Driss identifies three steps in this process, 1) getting an SSL certificate, 2) enabling HTTPS, and 3) redirecting HTTP to HTTPS. While this last step is great for production applications, I did not attempt this third part and simply run my application exclusively over HTTPS.
You can consult Driss’s full post for the details, but we’re going to change directories into the location we need our certificate and create a self-signed certificate:
cd idm/samples/webapp-spring-boot-saml2/
keytool -genkey -alias tomcat -storetype PKCS12 -keyalg RSA -keysize 2048 -keystore keystore.p12 -validity 3650
Once you execute the keytool command you’ll be prompted for several pieces of information to populate your SSL certificate. For my lab I used a password BLAHBLAH and came up with appropriate values for the remaining items.
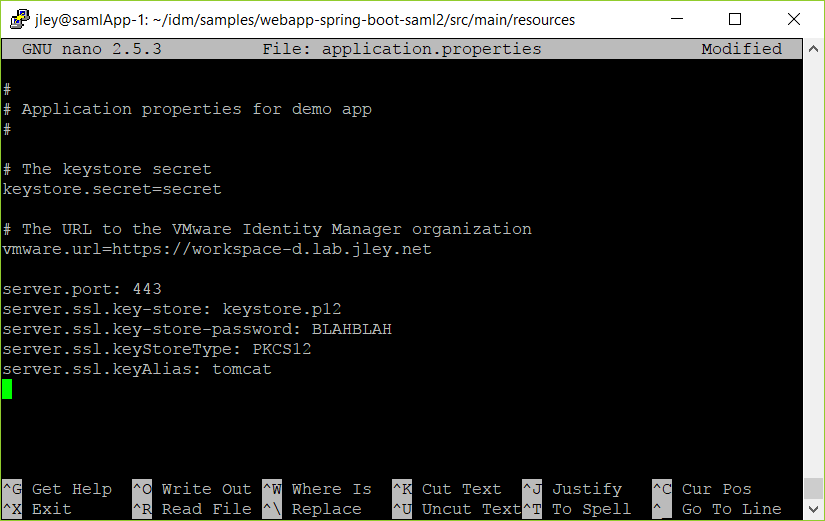
Following this we need to enable HTTPS within the application, which is done by editing our application.properties file:
cd src/main/resources
nano application.properties
Based on Driss’s post we’ll be adding the following lines:
server.port: 443
server.ssl.key-store: keystore.p12
server.ssl.key-store-password: BLAHBLAH
server.ssl.keyStoreType: PKCS12
server.ssl.keyAlias: tomcat
You’ll note here you can put in whatever port you’d like. If you are interested in running this on 443 (the standard HTTPS port) when manually starting the application you will have to do so using root privileges. If you elect to run the application on 8443, you’ll be able to start the application with regular user privileges.
Setting Identify Manager URL
While we’re in our application.properties file, we’ll also go ahead and update the url for the Identity Manager server, in my case named workspace-d.lab.jley.net.
To do this you’ll need to place the URL for the Identity Manager server as the value of vmware.url, replacing the default value “https://dev.vmwareidentity.asia.” Following this you will have a configuration file similar to the one shown below, which you can save (in nano: Ctrl+O, press enter to accept the file name, and then Ctrl+X to exit).
At this point we can return to the base directory of our application:
cd ../../../
Add Identity Manager SSL Certificate to Keystore
If you were to start the application at this point and watch the console, you’d see some messages along the lines of: “2017-09-08 19:36:57.431 ERROR 1575 — [ost-startStop-1] o.o.s.m.provider.HTTPMetadataProvider : Error retrieving metadata from https://workspace-d.lab.jley.net/SAAS/API/1.0/GET/metadata/idp.xml” followed by a rather lengthy stacktrace starting with “javax.net.ssl.SSLPeerUnverifiedException: SSL peer failed hostname validation for name: null”
Normally for such things I download the certificate in question and then copy it when it needs to be. However, in order to make this process as easy to follow as possible, I wanted to work out how do to this from our application server. With a slight assist from https://superuser.com/questions/1104984/get-a-servers-ssl-tls-certificate-using-openssl-s-client, I worked out an appropriate openssl command:
openssl s_client -connect workspace-d.lab.jley.net:443 | openssl x509 -outform der -out workspacecert.der
This will save the certificate for the identify manger server into a der file which we can then add to the application’s keystore:
keytool -importcert -alias workspace-d -file workspacecert.der -keystore ./src/main/resources/saml/samlKeystore.jks
When you do this, you’ll be prompted for the password for the keystore, secret. For reference, this is the other value in the application.properties file, stored as keystore.secret . If you get prompted twice for a new password, you haven’t referenced the existing file. Keep in mind the file names are case-sensitive. You will also be prompted to trust the certificate you are importing.
Build and Start the Application
At this point we’re ready to start the application. In the documentation for this sample application you’ll notice two options for starting it. I’m using the two-part build and run steps, with the idea of running this more than once.
First the build:
./gradlew build
Running the application then depends on which port you’re running the application on.
If you’re running on port 443 (or other well-known port number):
sudo java –jar build/libs/webapp-spring-boot-saml2.jar
otherwise:
java –jar build/libs/webapp-spring-boot-saml2.jar
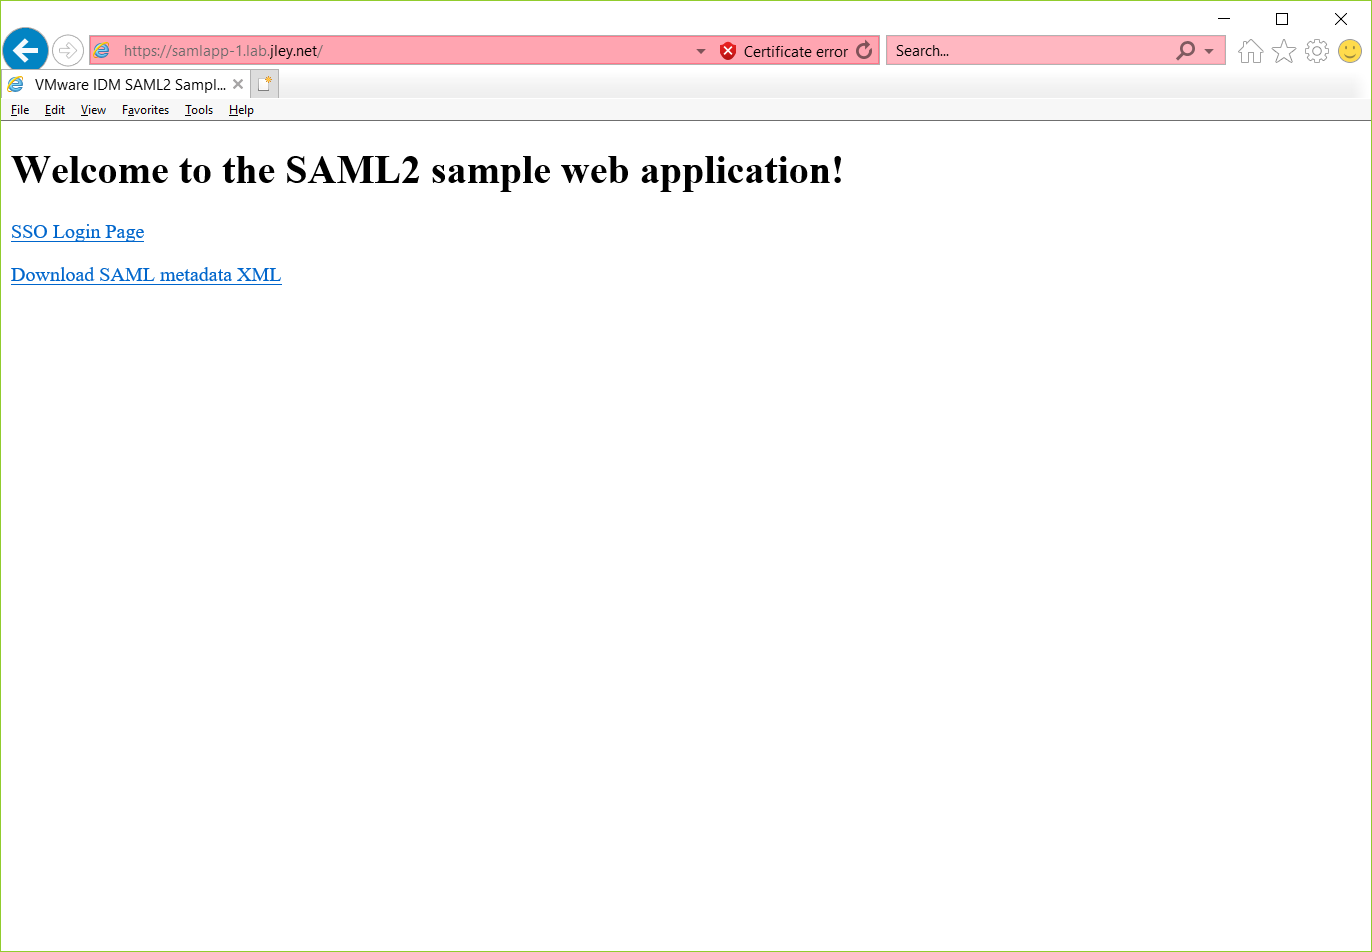
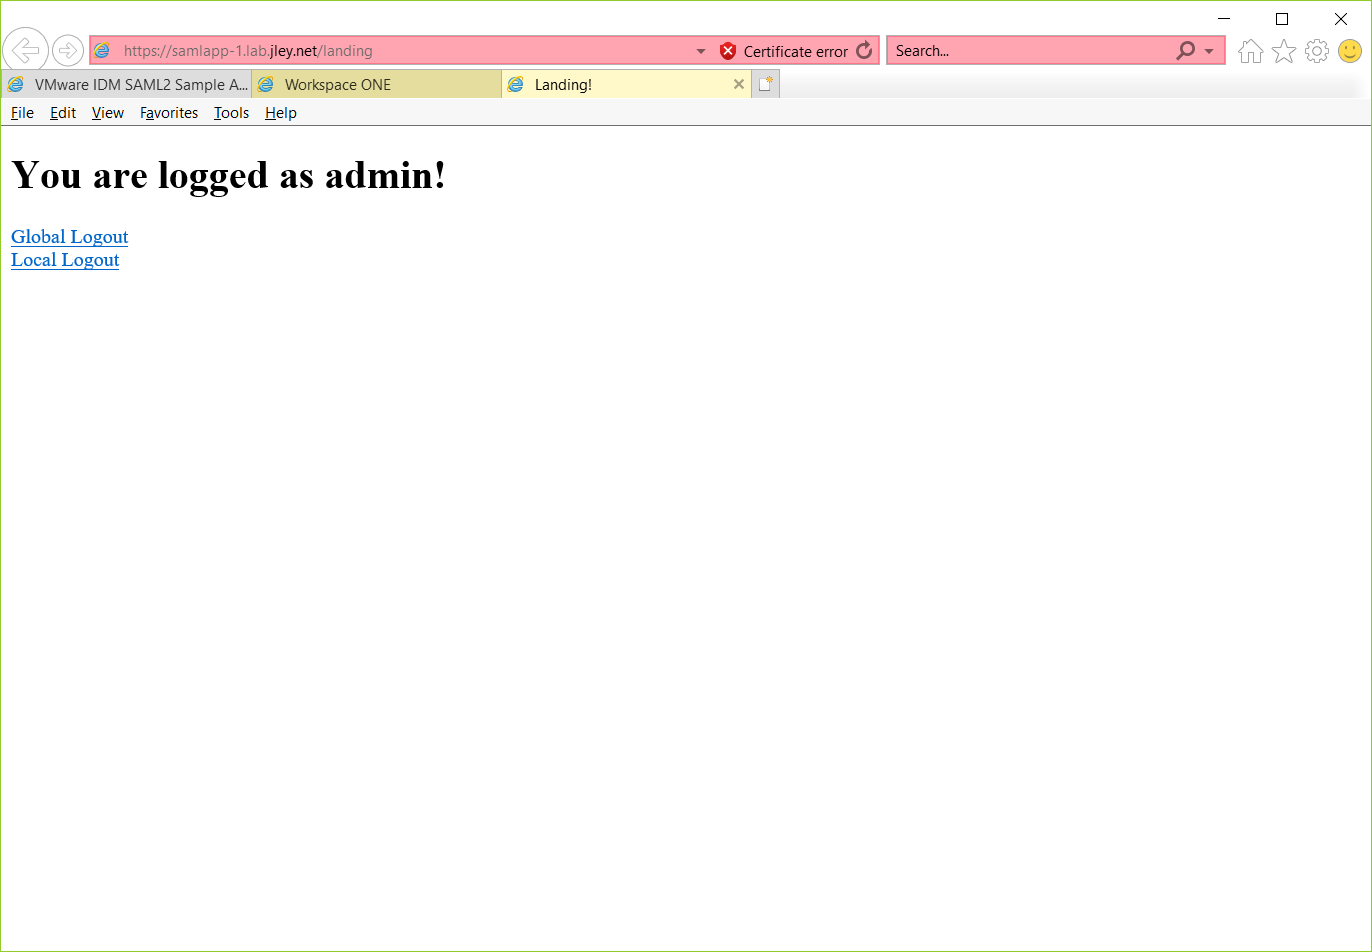
Once the application starts up and new messages stop appearing on the console, you should be able to open a web browser, construct a URL along the lines of https://HOSTNAME:PORTNUMBER, accept some security warnings, and view the SAML2 sample web application. An example is shown below:
When you’re ready to quit the application, a simple Ctrl+C in the console will end the application.
Add Application to Identity Manager Catalog
The sample application document describes the process of registering the application in the Identify Manager catalog under “Configure the Demo Application” starting at step 2. However, I will repeat the required steps here for completeness.
Assuming you’re logged into your Identity Manager instance as an administrator, you will create a new application in the application catalog. The first screen for creating the new application will ask for a name and description.
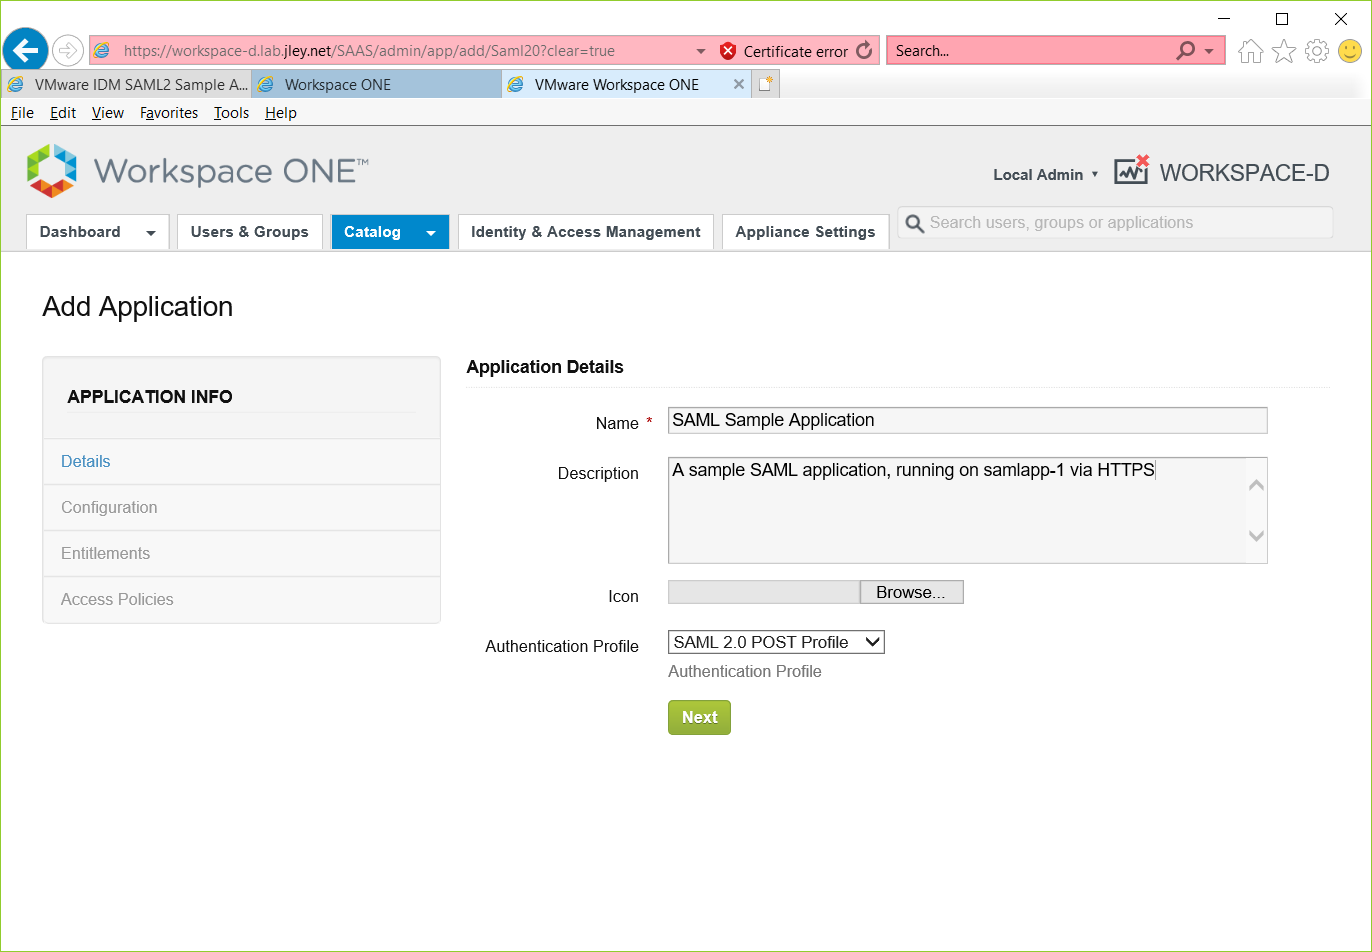
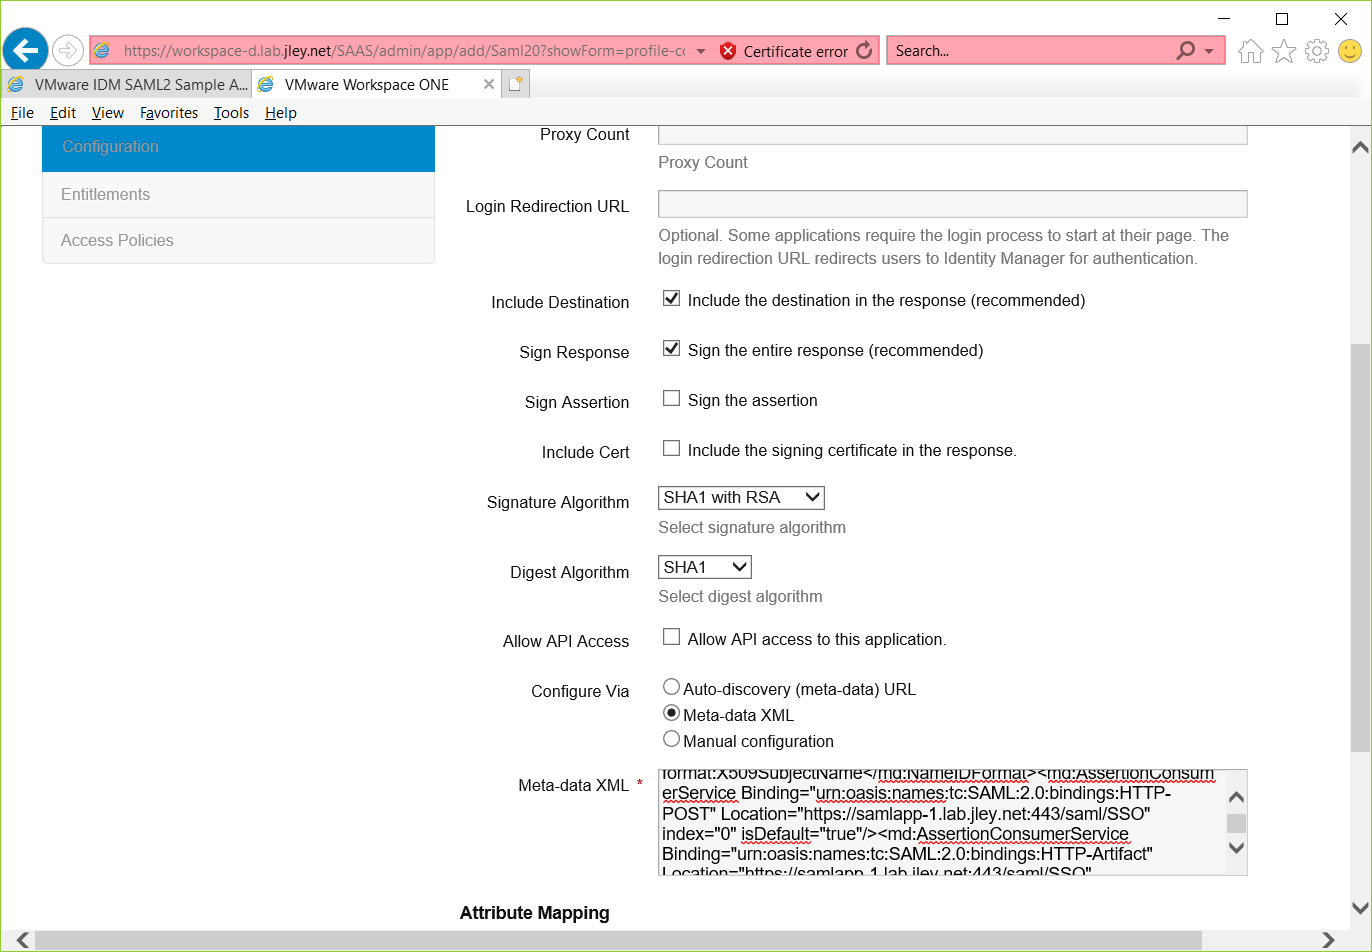
For this application the notable part of the second screen is to select Metadata XML as the value of “Configure Via.” You will need to paste the XML metadata into the supplied text box. This metadata can be found at https://HOSTNAME:PORTNUMBER/saml/metadata. You will need to save this file and copy the entire file contents into Identity Manager.
Once you have completed this and save the application, you’ll be able to entitle users. Be sure to press the DONE button once you’ve made appropriate entitlement selections.
Testing the Application
At this point you should be able to access the SAML application via the Workspace catalog, or via the application’s URL.
Automatic Startup of SAML Application
At this point the deployment is complete, however, the application must be manually started each time the virtual machine hosting it is restarted. With a few modifications it can start and stop with the hosting OS. The below steps are derived from the Spring Boot reference guide.
First we need to tell gradle to build our application as a fully executable jar file. This is done by editing build.gradle:
nano build.gradle
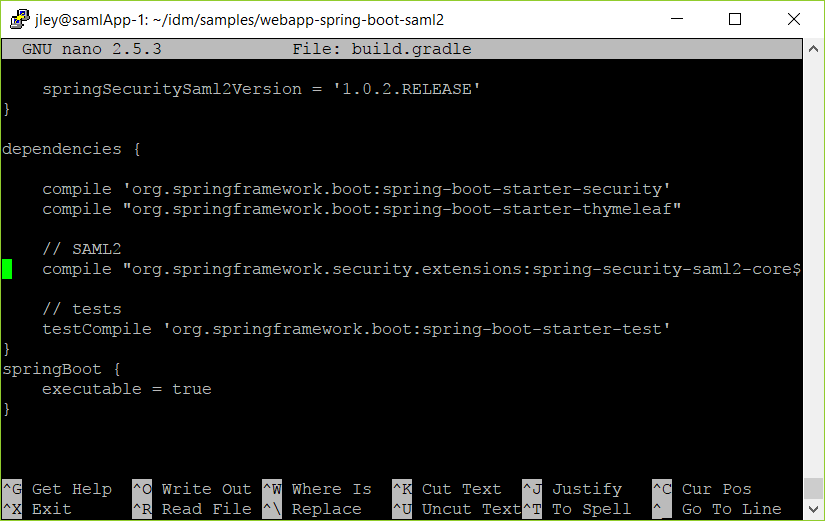
and adding the following to the bottom of the file:
springBoot {
    executable = true
}
this results in a file as shown below:
Once this is completed, compile the application again:
./gradlew build
Next we need to move our keystore.p12 file into the build/lib folder, as the gradle boot Spring Boot [updated 2018/04/14] process uses the jar file location as the startup directory.
cp keystore.p12 ./build/libs/.
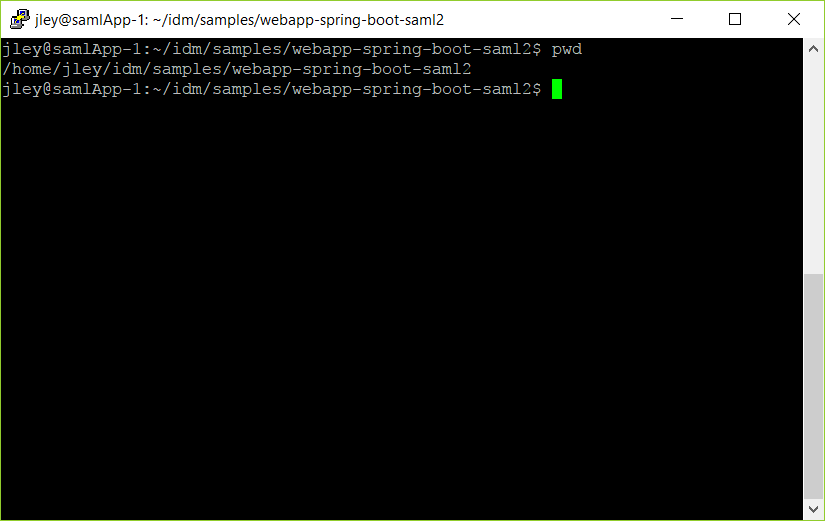
Finally we need to create the systemd service file as described in the Spring Boot documentation. To create this file you will need the full file path to the jar file. This will be something like /home/USERNAME/idm/samples/webapp-spring-boot-saml2/build/libs/ with an appropriate value for USERNAME. Using the pwd command you can verify the location of your webapp-spring-boot-saml2 folder:
pwd
This should result in output similar to:
Append to this path the location of the jar file build/libs/ along with the jar file name webapp-spring-boot-saml2.jar to construct the ExecStart statement for the service file. The resulting ExecStart string, for a user named jley is shown in the below example file.
When you create this file you will need to do so as the superuser:
sudo nano /etc/systemd/system/samlApp.service
Adding the content below to an otherwise empty file:
[Unit]
Description=samlApp
After=syslog.target

[Service]
User=root
ExecStart=/home/jley/idm/samples/webapp-spring-boot-saml2/build/libs/webapp-spring-boot-saml2.jar
SuccessExitStatus=143

[Install]
WantedBy=multi-user.target
Once you save this file, service samlApp start and service samlApp stop can be used to start and stop the application.
Finally, flag the application to automatically start on system boot:
systemctl enable samlApp.service
Running an application from a user home directory as root is not a good application deployment practice, but for our lab purposes will work.
Conclusion
At this point you have a working SAML application, registered with Identity Manager, and starting and stopping as you start and stop your VM.
If you found this beneficial, confusing, or some combination of two, please let me know via twitter @kayakerscout.